The FunTechHouse project, a open source home automation system - Mosquitto
MQTT
MQTT uses a publish subscribe model, that means that the device that is publishing some data do not know who will receive it he just pushes the data when it is ready. The other device that want a specific data tells the message broker that he would like to subscribe a specific data, and then the message broker will tell all the subscribers when new data is available.
Luckily there is some nice presentations about mqtt and why it is better, so I recommend that you view those before we continue.
- TEDxWarwick - Andy Stanford-Clark - Innovation Begins at Home
- The House That Twitters by Andy Stanford-Clark
- Messaging for the Internet of Awesome Things by Andy Piper
- Introducing MQTT by Andy Piper
Then if you would like even more information about mqtt, we have a couple more good links.
- http://mqtt.org/
- http://en.wikipedia.org/wiki/MQ_Telemetry_Transport
- http://www.ibm.com/developerworks/webservices/library/ws-mqtt/index.html
Mosquitto and the Raspberry Pi
But now back to what I plan to use, and that is the Mosquitto MQTT broker, it is Open Source and has implemented the version 3.1 of MQTT.
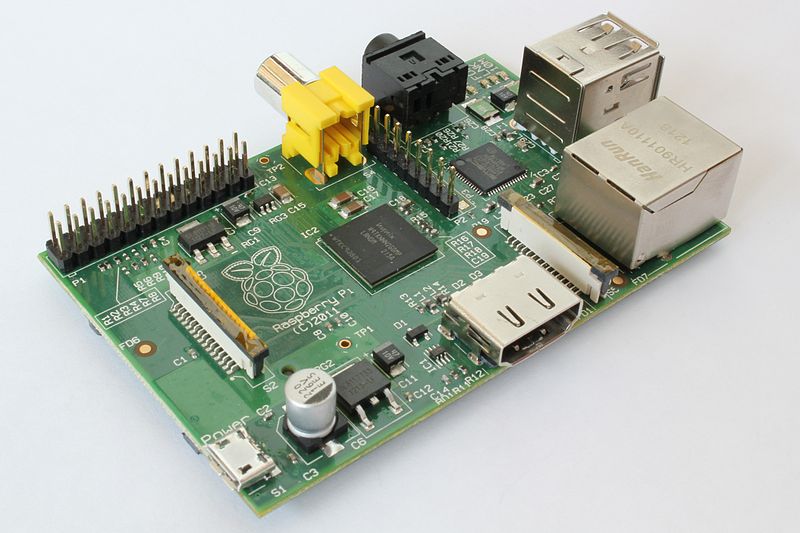
Now I could run this on whatever Linux based computer, put since we don't need that much power I will use something smaller. I will therefore use a Raspberry Pi that is way smaller, and has enough power for this application. Wikipedia has a nice article about the Pi if you are unsure what the Raspberry Pi is about.
MosqHub
The central device running Mosquitto will be called MosqHub in the The Tech House project, and it will be Raspberry Pi running Raspbian.
Install Raspbian
Download image
Download the Raspbian image from on the raspberry pi homepage as a torrent https://downloads.raspberrypi.org/raspbian_lite_latest.torrent (http://www.raspberrypi.org/downloads/).
This example will be based on:
Raspbian Jessie Lite
Minimal image based on Debian Jessie
Version: May 2016
Release date: 2016-05-10
Kernel version: 4.4
SHA-1: 333bfc855e8944ecb1142337ead8c928dc6c9d95
After download make sure the sha is the same with the sha1sum command.
$> sha1sum 2016-05-10-raspbian-jessie-lite.zip
333bfc855e8944ecb1142337ead8c928dc6c9d95  2016-05-10-raspbian-jessie-lite.zip
Unpack the image file from the zip.
$> unzip 2016-05-10-raspbian-jessie-lite.zipPut image on SD card
This is more or less the same as this page: http://www.raspberrypi.org/documentation/installation/installing-images/linux.md.
First insert the SD card.
If mounted use mount to get dev:
$> mount
/dev/sdb1 on /media/cj/6532-3730 type vfat (rw,nosuid,nodev,uid=1000,gid=1000,shortname=mixed,dmask=0077,utf8=1,showexec,flush,uhelper=udisks2)
If mounted then umount it
sudo umount /media/cj/6532-3730Or search in the kernel logs with dmesg
$> dmesg
[1081046.566174] sd 2:0:0:0: Attached scsi generic sg1 type 0
[1081046.719884] sd 2:0:0:0: [sdb] 31116288 512-byte logical blocks: (15.9 GB/14.8 GiB)
[1081046.721255] sd 2:0:0:0: [sdb] Write Protect is off
[1081046.721266] sd 2:0:0:0: [sdb] Mode Sense: 03 00 00 00
[1081046.722614] sd 2:0:0:0: [sdb] No Caching mode page found
[1081046.722623] sd 2:0:0:0: [sdb] Assuming drive cache: write through
[1081046.728243] sd 2:0:0:0: [sdb] No Caching mode page found
[1081046.728255] sd 2:0:0:0: [sdb] Assuming drive cache: write through
[1081046.743914]  sdb: sdb1
[1081046.753493] sd 2:0:0:0: [sdb] No Caching mode page found
[1081046.753506] sd 2:0:0:0: [sdb] Assuming drive cache: write through
[1081046.753516] sd 2:0:0:0: [sdb] Attached SCSI removable disk
My card is in /dev/sdb and it has a partition called /dev/sdb1.
Put the image on the card with dd, make sure you get the device correct or you WILL break something!
$> sudo dd bs=4M if=2016-05-10-raspbian-jessie-lite.img of=/dev/sdb
330+1 records in
330+1 records out
1386217472 bytes (1,4 GB) copied, 215,161 s, 6,4 MB/s
First startup
During the first startup I have the PI connected to a monitor and keyboard.
Run the setup tool.
sudo raspi-config - 1. Expand filesystem
- 4. Wait for Network at Boot (Slow Wait for network connection before completing boot)
- 8. Advanced - A2 Hostname (i set this to jsipi)
- 8. Advanced - A4 SSH, enable the ssh server.
Then select finish and reboot and startup the first time.
Find the PI
Depends on: https://github.com/jsiei97/git_bin/blob/master/ping_search.sh
Power off the PI and list all devices on your network that answers to ping with the ping_search command and store the result in a file called 1.txt.
ping_search.sh 192.168.0 | sort | tee 1.txtThen power on the PI and do the same thing but save the result in a file called 2.txt
ping_search.sh 192.168.0 | sort | tee 2.txtThen diff the two files and the new ip should be your pi.
diff 1.txt 2.txt
10a11
> Found one: 192.168.0.171
If you like you can double check the MAC address with the arp command
arp -n | grep 192.168.0.171
192.168.0.171            ether   b8:27:eb:e0:f1:ae   C                     eth0
And then you try to ssh to the pi with the default user pi.
$> ssh -X pi@192.168.0.171
pi@192.168.0.171's password:
Linux jsipi 3.18.11+ #781 PREEMPT Tue Apr 21 18:02:18 BST 2015 armv6l

The programs included with the Debian GNU/Linux system are free software;
the exact distribution terms for each program are described in the
individual files in /usr/share/doc/*/copyright.

Debian GNU/Linux comes with ABSOLUTELY NO WARRANTY, to the extent
permitted by applicable law.
Last login: Mon Jul 27 18:14:30 2015
/usr/bin/xauth:  file /home/pi/.Xauthority does not exist
pi@jsipi ~ $
If you can login and the prompt has the correct hostname then you are done.
New user
Since it is a bad idea to use the default user/password I usually add my own user, that in this example will be called nisse.
sudo adduser nisseThen enter your password, do NOT leave blank!
The default user is part of a lot of groups, and the new user needs them as well.
groups
pi adm dialout cdrom sudo audio video plugdev games users netdev input spi gpio
So why not just add all of those groups to the new user nisse with the addgroup command.
for gr in `groups`; do sudo addgroup nisse $gr; doneThen you can try to ssh ion with this new user and check that he has all the groups, and is allowed to use the sudo command.
$> ssh -X nisse@192.168.0.171
nisse@192.168.0.171's password:
Linux jsipi 3.18.11+ #781 PREEMPT Tue Apr 21 18:02:18 BST 2015 armv6l

The programs included with the Debian GNU/Linux system are free software;
the exact distribution terms for each program are described in the
individual files in /usr/share/doc/*/copyright.

Debian GNU/Linux comes with ABSOLUTELY NO WARRANTY, to the extent
permitted by applicable law.
/usr/bin/xauth:  file /home/cj/.Xauthority does not exist
nisse@jsipi ~ $
nisse@jsipi ~ $ groups
nisse adm dialout cdrom sudo audio video plugdev games users netdev gpio i2c spi input pi
nisse@jsipi ~ $ sudo ls
[sudo] password for nisse:
pistore.desktop
nisse@jsipi ~ $
If the new user works as you intended, then remove the default user pi.
sudo deluser piThen to simplify things you back out to your pc, and add some ssh login keys with ssh-copy-id.
exit
ssh-copy-id nisse@192.168.0.171
ssh -X nisse@192.168.0.171
Install the base
sudo apt-get update
sudo apt-get upgrade
sudo apt-get install git git-core xclip
sudo apt-get install vim vim-gtk vim-runtime vim-scripts exuberant-ctags cscope
Create ssh key and update your github acount, https://help.github.com/articles/generating-ssh-keys.
ssh-keygen -t rsa -b 4096
xclip -sel clip < ~/.ssh/id_rsa.pub
And paste it on the ssh page https://github.com/settings/ssh.
Update ~/.gitconfig with your name a mail, so it looks a little bit like this:
[user]
    name = Nisse Hult
    email = nisse@my.mail.se
Run the FT_Tools scripts
cd ~
mkdir -p funtech/
cd funtech/
git clone git@github.com:jsiei97/FT_Tools.git
cd FT_Tools/

./get.ft.env.sh
./get.LC.sv_SE.utf8.sh
sudo ./pkg.raspian.mosqhub.sh
Select timezone
If you need local time then select your correct timezone
sudo dpkg-reconfigure tzdataIn my case I selected Europe and Stockholm to get the Swedish timezone.
Install Mosquitto
To build and install mosquitto, run the install.mosquitto.sh (FT_Tools).
./install.mosquitto.sh Test Mosquitto
Then restart and check that mosquitto is running with ps.
$> ps -A | grep mosq
2111 ?        00:00:00 mosquitto
Then test the server with mosquitto_pub and mosquitto_sub, so in one window start the subscribe command.
mosquitto_sub -h localhost -v -t test
#or
mosquitto_sub -h localhost -v -t '#'
Then send a message to that topic.
mosquitto_pub -h localhost -t test -m 'hello world'At this point the string "hello world" should be printed by mosquitto_sub.
Test monit
Then check that monit is working by killing mosquitto and wait for monit to restart it.
$> ps -A | grep mosq
2111 ?        00:00:00 mosquitto
$> kill 2111
$> ps -A | grep mosq
$> ps -A | grep mosq
$> ps -A | grep mosq
2205 ?        00:00:00 mosquitto
$>
Please note that when mosquitto is restarted it has a new pid, in this example it starts with 2111 but has 2205 after the restart. Also note that may take some 1-2 minutes before detects and restart mosquitto.
